“Data warehouses always need an explicit date dimension table. There are many date attributes not supported by the SQL Date function, including fiscal periods, seasons, holidays, and weekends. Rather than attempting to determine these nonstandard calendar calculations in a query, we should look them up in a date dimension table.”
The first step is to launch Kettle from the desktop. I have GeoKettle installed on my machine, which, for those who don't know, is simply a spatially enabled version of Pentaho's Open source ETL platform (Kettle). If you don't have GeoKettle installed, my previous post shows the steps to download and install it on your local machine.
Using the sample Transformation as the starting point.
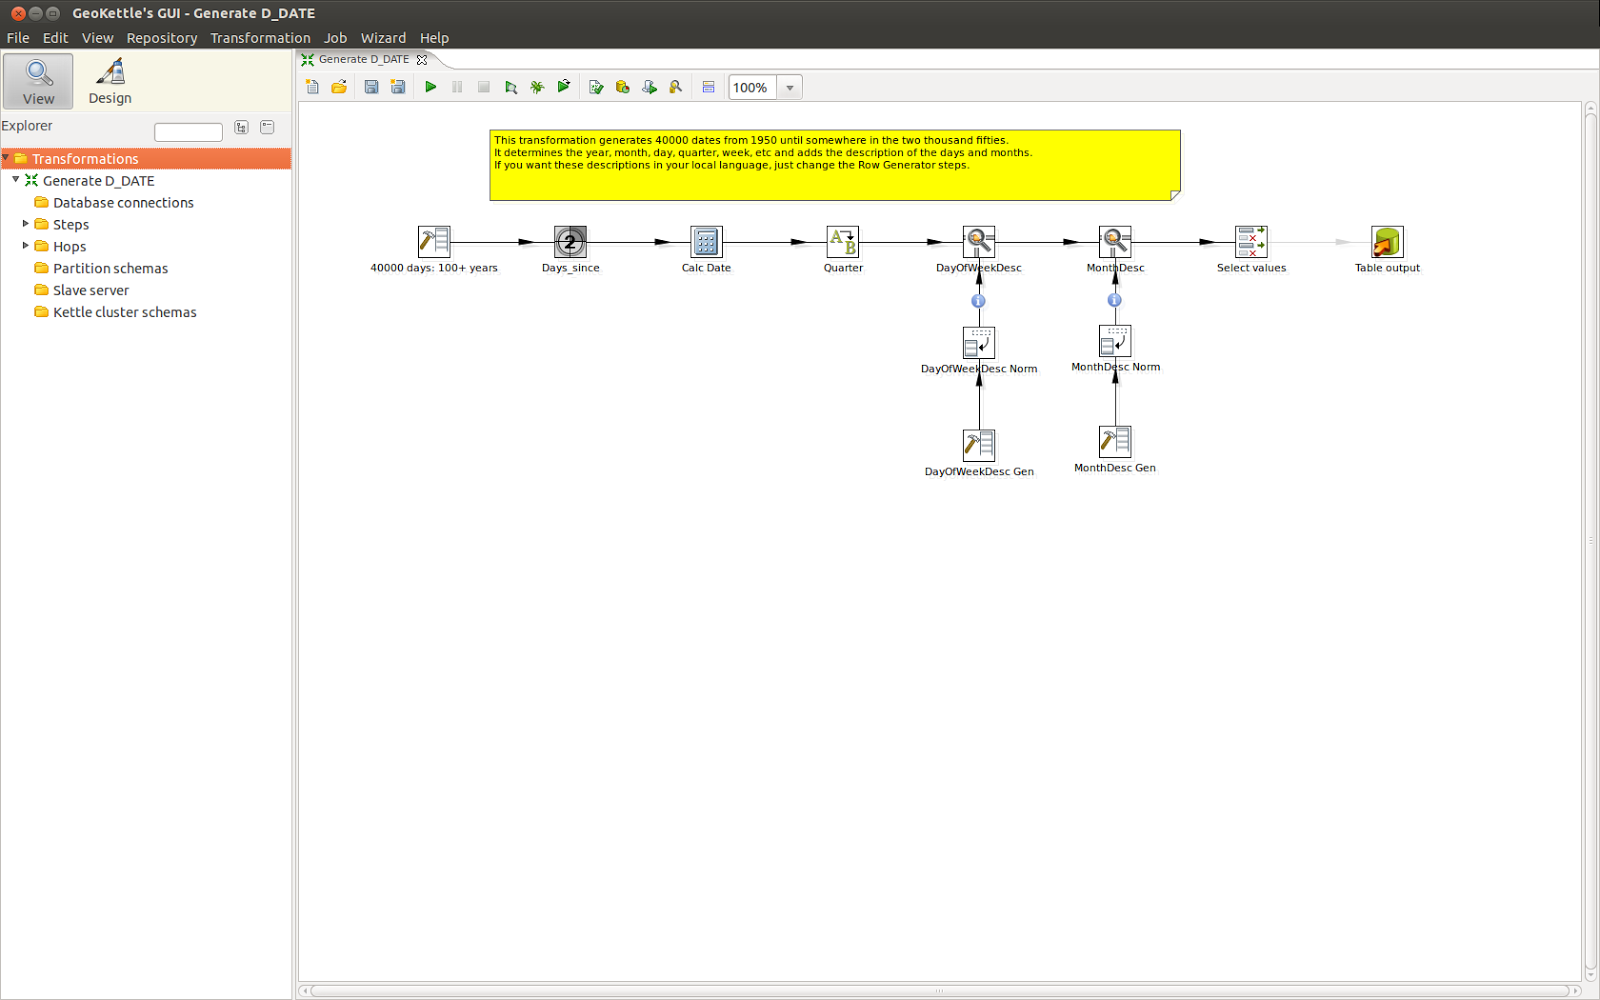
GeoKettle ships with some sample transformations that allow creation of Date dimensions. We can start with these and augment them based on our needs. The first two dimensions that are needed are Date and Time. According to best practices, Date and Time should be modeled as separate dimensionsLaunching GeoKettle
If you have GeoKettle installed, launch it from the Applications menu on your machine.
Once
GeoKettle is launched, go to the samples folder under
GeoKettle/samples and open the file “General – Populate date
dimension.ktr”

The
following transformation is loaded on the screen.
Save
the file to your local directory for review and possible
modification. I saved the transformation with the
GenerateDateDimension.ktr under my local work folder.

The
default transformation generates dates from 1950 all the way to 2050.
I only needed 50 odd years of dates for my purposes, so I needed to
modify the start date. Right
click and Edit the first step on the transformation to
view dialog box for "Generate Rows."

In
the dialog box that opens, we can see the default values as follows:

Now
lets modify the default values as follows.
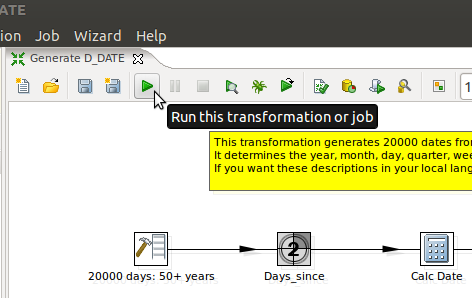
Step
name: 20000 days: 50+ years
Limit:
20000
Fields
> Value: 19900101

Next
thing we need to do is to update the Table output parameters to our
selected database schema. Right click on the "Table Output" step as shown in the screenshot below.

Define
the database connection, by clicking on the "New" button next to the Connection field on the open dialog box.

Select
the schema and table name. In my case, it was nydot and dim_date.

Click OK when done.
The
last step is to enable the hop, by right clicking on the arrow
connecting to the last step and clicking on “Enable Hop” as shown
in the picture below.

Next
step is to run the transformation and test to make sure it works
correctly. For this we click on the play button on the top menu, as
shown in the picture below.
Clicking
the button brings up the following dialog box.

Now,
click on the Launch button to start the transformation. Once the
transformation has executed, we can see the following metrics
displayed on the screen.

Open
pgAdmin tool to view the data by navigating to the schema and the
date_dim table that was just created.

Also,
now right clicking and viewing data

....
shows that the table is populated correctly.

We have just seen how to populate a basic Date Dimension table using Kettle open source ETL tool.