Search This Blog

Tuesday, November 29, 2016

Using an Angular 2 Material Design component

In this post, we will utilize the material design library being developed as part of Angular 2 to build a simple set of cards. In previous posts, we already covered the following


We will build on past experiences to introduce ourselves to material design with Angular 2, which is still evolving. Overall process is as follows
  1. Start a new project and add the material design library to our project
  2. Create a new component using angular-cli
  3. Build a JSON REST service stub (we will simply emulate the service, not build it.)
  4. Use some material design components within our component
  5. Bind our component to the REST service
  6. View the final result.
At the end we will build a simple set of cards that look like the following:


Let's get started.

Adding Material Design to our project

Adding material design to the project is simple. Since I needed to carry out a few steps, I did the following steps
  • I first created a new project using "ng new"
  • Then added material design to the project node modules using the following command. 
  • Next I generated a component called mycard.
  • Finally I created a service called CardService.
The following steps document the script.

ng new ng2-3
cd ng2-3
npm install --save @angular/material
ng generate component mycard
ng generate service cards

Next we need to import the material design module within our primary application module. Access the application.module.ts and add the following lines at appropriate places.

import { MaterialModule } from '@angular/material';

@NgModule({
imports: [
    MaterialModule.forRoot(), ...
  ],

We also need the component definition added to app.module.ts

import { MycardComponent } from './mycard/mycard.component';

@NgModule({
  declarations: [
    MycardComponent...

Here is how the updated app.module.ts looks in my editor

app.module.ts

import { BrowserModule } from '@angular/platform-browser';
import { NgModule } from '@angular/core';
import { FormsModule } from '@angular/forms';
import { HttpModule } from '@angular/http';
import { MaterialModule } from '@angular/material';
import { AppComponent } from './app.component';
import { MycardComponent } from './mycard/mycard.component';

@NgModule({
  declarations: [
    AppComponent,
    MycardComponent
  ],
  imports: [
    BrowserModule,
    FormsModule,
    HttpModule,
    MaterialModule.forRoot()
  ],
  providers: [],
  bootstrap: [AppComponent]
})
export class AppModule { }

A screenshot of the same..


Building a Service Stub

Next step is to edit the card.service.ts file to return a set of cards. I used the following JSON structure and code to create the service stub.

card.service.ts

import { Injectable } from '@angular/core';

@Injectable()
export class CardService {

    cards = [{
                "svc_cardid": 1,
                "svc_cardname": "Birds of Norfolk"
                ,"svc_cardlink": "https://commons.wikimedia.org/wiki/Category:Decorative_papers#/media/File:The_birds_of_Norfolk_-_with_remarks_on_their_habits,_migration,_and_local_distribution_(1866)_(14750215905).jpg"
                ,"svc_cardimg":"https://upload.wikimedia.org/wikipedia/commons/3/3f/The_birds_of_Norfolk_-_with_remarks_on_their_habits%2C_migration%2C_and_local_distribution_%281866%29_%2814750215905%29.jpg"
                ,"Identifier": "birdsofnorfolkwi01stev"
                ,"Title": "The birds of Norfolk : with remarks on their habits, migration, and local distribution"
                ,"Year": 1866
                ,"Authors": "Stevenson, Henry, 1833-1888 Southwell, Thomas, 1831-1909"
                ,"Subjects": "Birds -- England Norfolk"
                ,"Publisher": "London : J. Van Voorst"
                ,"Contributing_Library": "American Museum of Natural History Library"
                ,"Digitizing_Sponsor": "Biodiversity Heritage Library"
              }, {
                "svc_cardid": 2,
                "svc_cardname": "1902 Annual Report"
                ,"svc_cardlink": "https://commons.wikimedia.org/wiki/Category:Decorative_papers#/media/File:Annual_report_(1906)_(14745691021).jpg"
                ,"svc_cardimg":"https://upload.wikimedia.org/wikipedia/commons/7/7d/Annual_report_%281906%29_%2814745691021%29.jpg"
                ,"Identifier": "annualreport131415190newy"
                ,"Title": "Annual report"
                ,"Year": 1902
                ,"Authors": "Forest, Fish and Game Commission"
                ,"Subjects": "Forests and forestry Fisheries Game and game-birds"
                ,"Publisher": "(Albany, N.Y. : The Commission)"
                ,"Contributing_Library": "Smithsonian Libraries"
                ,"Digitizing_Sponsor": "Biodiversity Heritage Library"
              }, {
                "svc_cardid": 3,
                "svc_cardname": "Cooperative economic insects"
                ,"svc_cardlink": "https://commons.wikimedia.org/wiki/Category:Decorative_papers#/media/File:Cooperative_economic_insect_report_(1955)_(20671420826).jpg"
                ,"svc_cardimg":"https://upload.wikimedia.org/wikipedia/commons/9/9e/Cooperative_economic_insect_report_%281955%29_%2820671420826%29.jpg"
                ,"Identifier": "cooperativeecono51955unit"
                ,"Title": "Cooperative economic insect report"
                ,"Year": 1951
                ,"Authors": "Animal and Plant Health Service."
                ,"Subjects": "Beneficial insects; Insect pests"
                ,"Publisher": "Hyattsville, MD. (etc. )"
                ,"Contributing_Library": "Smithsonian Libraries"
                ,"Digitizing_Sponsor": "Biodiversity Heritage Library"
              }, {
                "svc_cardid": 4,
                "svc_cardname": "Histoire de Quillembois soldat"
                ,"svc_cardlink":"https://commons.wikimedia.org/wiki/File:Histoire_de_Quillembois_soldat_(1920)_(14750774484).jpg"
                ,"svc_cardimg": "https://upload.wikimedia.org/wikipedia/commons/f/f3/Histoire_de_Quillembois_soldat_%281920%29_%2814750774484%29.jpg"
                ,"Identifier": "histoiredequille001871"
                ,"Title": "Histoire de Quillembois soldat"
                ,"Year": 1920
                ,"Authors": "1871-1935"
                ,"Subjects":""
                ,"Publisher": "Nancy, Paris (etc.) : Librairie Berger-Levrault"
                ,"Contributing_Library": "New York Public Library"
                ,"Digitizing_Sponsor": "msn"
              }];


  constructor() { }

  getCards(): any {
    console.log("CardService.getCards() called");
    return this.cards;

   }
}

 Next, we want to add some behaviour to the cards, as follows
  • When a card is clicked, it goes in expanded mode. 
  • When it is clicked again, it resumes to its non-expanded mode.
  • We also want the card to raise an event that can be implemented by the host component if needed. For this we add an Output parameter that raises an event using EventEmitter. 
How the expanded mode differs from non-expanded, we will define in our style sheet later.

mycard.component.ts


import { Component, OnInit, Input, Output, EventEmitter } from '@angular/core';

@Component({
  selector: 'mycard',
  templateUrl: './mycard.component.html',
  styleUrls: ['./mycard.component.css']
})
export class MycardComponent implements OnInit {
  @Input() cardid = -1;
  @Input() cardname="";
  @Input() cardimage="";
  @Input() cardyear;
  @Input() cardauthor;
  @Input() cardpublisher;
  @Input() cardlink;
  @Input() isExpanded = false;
  @Output() cardClicked = new EventEmitter();

  constructor() {
      console.log("MycardComponent.constructor() called");
  }

  ngOnInit() {
  }

  onDivClick()
  {
      this.isExpanded = !this.isExpanded;
      console.log("MycardComponent.onDivClick("+this.cardid+").isExpanded(): "+this.isExpanded);
      this.cardClicked.emit(this.cardid);
  }

  onDivHover()
  {
      console.log("MycardComponent.onDivHover("+this.cardid+") called");
  } 
}

Here is a screenshot of my editor screen.


Next, we add the edit the mycard.component.html to add the rendering logic as follows

  • An outer div tag to capture click events that calls onDivClick() in the component class
  • A md-card that has a ternary operator for loading appropriate css class based on the component's state isExpanded. The md-card contains the following sub-elements.
    • An image with md-card-image directive and an image sourced from a component property
    • A md-card-title based on the cardname property of the class
    • A md-card-content containing a description obtained by concatenating several properties of the card.
    • A md-raised-button with accent color. 

mycard.component.html 

<div (click)="onDivClick()" (hover)="onDivHover()">
  <md-card class="my-card {{isExpanded?'my-card-expanded':''}}">
      <img class="md-card-image" src="{{cardimage}}" md-card-image/>
    <div >
      <md-card-title>{{cardname}}</md-card-title>
    </div>
    <div >
      <md-card-content>Authors: {{cardauthor}}, Published: {{cardyear}} by {{cardpublisher}}</md-card-content>
    </div>
    <button md-raised-button color="accent">View</button>
  </md-card> 
</div>

Here is the screenshot of the same..


mycard.component.css

The css contains the style definition for the cards. Here are some important observations

  • The default css for my-card simply sets 300px as width and height, sets a background color and a top and bottom margin.
  • The expanded card increases the height to 600px.
  • md-card-image restricts the height of the image to 180px, and sets object-fit to cover. This ensures that image is cropped to fit the placeholder
  • Finally md-card-title overrides the default font size to 20px, to save some space.
.my-card {
    width: 300px;
    height:300px;
    margin-left: 0;
    margin-right:0;
    background-color:#eaeaea;
    margin-top:10px;
    margin-bottom:10px;
}

.my-card-expanded {
   width: 300px;
    height:600px;
    margin-left: 0;
    margin-right:0;
    background-color:#eaeaea;
    margin-top:10px;
    margin-bottom:10px;
}

.md-card-image {
    height: 180px;
    object-fit: cover;
}

.md-card-title {
    font-size: 20px;
    font-weight: 400;
}

Here is a screenshot of the same..


Binding the service to mycard component

Next step is to bind the data received from the CardService to mycard component. This is done by the component initialising the mycard component. We also need to add the component to our primary app component. This is done in app.component.ts

app.component.ts

Here we do a few things.
  • We import the CardService that we had defined earlier
  • We define a variable called cards;
  • We add the cardService to the constructor using dependency injection. Here we also assign the return type from getCards to the AppComponent's cards variable
  • We also add an event handler for the component's click event, simply to log which card was clicked.

import { Component } from '@angular/core';
import {CardService} from './card.service';

@Component({
  selector: 'app-root',
  templateUrl: './app.component.html',
  styleUrls: ['./app.component.css'],
   providers: [CardService]
})
export class AppComponent {
  title = 'Material Design Tiles!';
  cards;
  
  constructor(cardService: CardService) {
     console.log("app.component.constructor() called");
     this.cards=cardService.getCards();
  }

  compCardClicked($event) {
    console.log("app.component.compCardClicked() called for:"+ $event);
  }
}

Here is a screenshot of the same:


Finally, we need to add our component to the app.component.html.

app.component.html

Here we do the following things
  • We check if cards is populated, then we instantiate a div container with class=container (we will discuss this part next).
  • Within the div container, we create a for loop using ngFor directive, that iterates over the cards property of the app.component class (app.component.ts), and puts it within a my-card tag. 
  • The html code also sets various properties of the mycard component using data received from the service.
  • The html markup also looks for cardClicked event raised by each card and calls the compCardClicked() method in the app.component class.

<h1>
</h1>
<div *ngIf="cards" class="container">
  <div *ngFor="let card of cards, let i = index">
    <mycard [cardname]="card.svc_cardname" [cardid]="card.svc_cardid" 
              [cardimage]="card.svc_cardimg" [cardauthor]="card.Authors" 
              [cardyear]="card.Year" [cardpublisher]="card.Publisher" 
              [cardlink]="card.svc_cardlink"
              (cardClicked)="compCardClicked($event)"></mycard>
  </div>
</div>

Here is the html markup on my screen editor..


Finally, we tackle the styling within app.component.css.

app.component.css

The only definition is for the container class that sets the following

  • A flex layout oriented by rows with row wrap to ensure mycards are wrapped based on space available.
  • A justify content (based on rows) and across "align-content" based on space-around.

.container {
  display: flex; /* or inline-flex */
  flex-flow: row wrap;
  justify-content: space-around;
  align-content: space-around;
  min-height: 110%;
}

Here is the screenshot, once again..


Running it

Finally we can use ng serve command to view the configured page on localhost:4200

This is the normal mode


and now the expanded mode after clicking on the card..


Here is the same site with console logs visible


That's it!

Sunday, November 27, 2016

Bootstrap and Two-way binding with Angular2

In my previous post, we had examined event and property binding in Angular 2, along with setting up angular from scratch. In this post, we will add bootstrap 4 to our Angular2 environment, and then test a component to see some of the capabilities of the library.  We will also examine two way binding using the bootstrap components..

Creating a new project

Since we already installed angular-cli in the previous blog, lets create a new project called ng2-2 using "ng new" command. Let us also cd into the newly created project directory..


ng new ng2-2
cd ng2-2

This creates the new project.

Installing bootstrap

First step is to install bootstrap. We will install angular2 compliant bootstrap version called ng2-bootstrap. ng2-bootstrap utilizes the new Angular2 concepts to provide a Typescript based bootstrap library. Importantly it does not directly access the DOM.

This step requires the following commands to be run from within the ng2 folder on the command line.. Please note that we are deploying an alpha version of the bootstrap 4 library. Needless to say, it will have to be updated with the latest versions as they are released.


npm install --save bootstrap@4.0.0-alpha.5
npm install --save @ng-bootstrap/ng-bootstrap

Results will be similar to screen below


Making ng2-bootstrap available to the project

To make the newly added ng2-bootstrap library available to the entire project, we need to add it to the app.module.ts file.. We add the following the two lines to our file


import {NgbModule} from '@ng-bootstrap/ng-bootstrap';

imports: [
    NgbModule.forRoot(), ...
  ],

The following content shows these two lines added to my app.module.ts file

import { BrowserModule } from '@angular/platform-browser';
import { NgModule } from '@angular/core';
import { FormsModule } from '@angular/forms';
import { HttpModule } from '@angular/http';
import {NgbModule} from '@ng-bootstrap/ng-bootstrap';
import { AppComponent } from './app.component';
import { LikesComponent } from './likes/likes.component';

@NgModule({
  declarations: [
    AppComponent,
    LikesComponent
  ],
  imports: [
    BrowserModule,
    FormsModule,
    HttpModule,
    NgbModule.forRoot()
  ],
  providers: [],
  bootstrap: [AppComponent]
})
export class AppModule { }

It looks as follows in my editor


Creating a new component

At this step, we will create a new component within our project called "likes". This is the component that will be used within our example. To create a new component using angular-cli, we just need to type the command ng generate component . I used the following command..

ng generate component likes

This generated the component in our project, and we can open the project in vscode (or your preferred IDE). In my vscode, the newly created project with the new component looks like the following:


In the next steps, we will make changes to the generated files to try two way binding in Angular2 as well as bootstrap components provided by ng-bootstrap.


Overall logic

Overall logic is fairly straightforward. We want to use the a rating component in our test. We want the component to be initialized based on a value in our business logic. When the user changes the values on the ratings, we want the component's internal value to be updated.

We would like to use angular2 two way binding. Angular2 provides an event and a property binding that would suffice to implement two-way binding. However, Angular2 also provides a short-hand way of implementing two-way binding. In this post, we shall try both. As we shall see separating the event binding also allows us to add additional behaviour. Here is the final screen..


Let us first start with the component's presentation logic

Component Presentation logic

The component presentation logic requires changes to ./app/likes/likes.component.html. Here we want the following items displayed on the page..

  • A label for implicit two way binding in Angular2
  • The ngb-rating component configured using Angular's shorthand two-way binding approach. Notice the square and regular brackets around the rate property of the rating component. In html components where two-way binding has not been built in, another way to implement implicit two way binding is to use [(ngModel)] directive. The ngb-rating component also contains a max property that controls number of stars displayed
  • Another ngb-rating component configured using a separate property and event binding, called through the onRate method in the component class. This allows us to program additional behaviour
  • An input text box that also implements explicit two way binding. Its value gets updated from the component, and any changed value updates the component as well using the updateRating() method in the component class. The implicit way to implement two-way binding would be to use the [(ngModel)] directive mentioned earlier.
  • A label showing number of ratings selected through the value of the ratings property.
  • A label for Total likes

<p>
  likes works!
</p>
<p>Implicit two way binding</p>
<ngb-rating [max]="maxStars" [(rate)]="ratings">
</ngb-rating>
<p> Explicit Two way binding</p>
<br/>
<ngb-rating [max]="maxStars" [rate]="ratings" (rateChange)="onRate($event)">
</ngb-rating>
<br/>
<input type="text" [value]="ratings" (change)="updateRating($event)">
<br/>
<p> Current rate: {{ratings}}</p>
<br/>
<span>Total likes: {{totalLikes}} </span>

Here is how the same code looks on my vscode screen.


The application logic

The application logic is also straightforward

  • Our component decorator selects the "likes" tag and inserts our component's presentation code specified in the previous step within likes.component.html
  • We declare 3 component level properties for totalLikes, ratings and maxStars, each initialized appropriately
  • An updateRating() method, called when the text box is updated, updates the ratings property with the value entered in the text box.
  • An onRate() method, sets the value of the ratings property based on value selected in the second component.


import { Component, OnInit, Input } from '@angular/core';

@Component({
  selector: 'likes',
  templateUrl: './likes.component.html',
  styleUrls: ['./likes.component.css']
})
export class LikesComponent implements OnInit {

@Input() totalLikes = 6;
@Input() ratings = 4;
@Input() maxStars = 7;

  constructor() { }

  ngOnInit() {
  }

  onClick(){
  }

  updateRating($event) {
    this.ratings = $event.target.value;
  }

  onRate(value) {
    console.log("Rate changed to " + value);
    this.ratings = value;
   }
}

This is how it looks on my vscode screen


Putting it together

To put it together, we just need to update our app.component.ts to add the Likes command..

<h1>
  {{title}}
</h1>
<likes></likes>

On my vscode screen


The behaviour

The behaviour is straightforward

  1. The page loads with the default settings for the page


2. Clicking the first component, updates values for all the other components. We increase the value to 6, as shown below:


3. Now we click the second component and bring the value down to 2.


4. Finally, we edit the value in the text box and that should update values for all components as well.


I am sure more creative ways can be conjured to demonstrate the same, but this should explain how the two way binding works with Angular2 and bootstrap.


Saturday, November 26, 2016

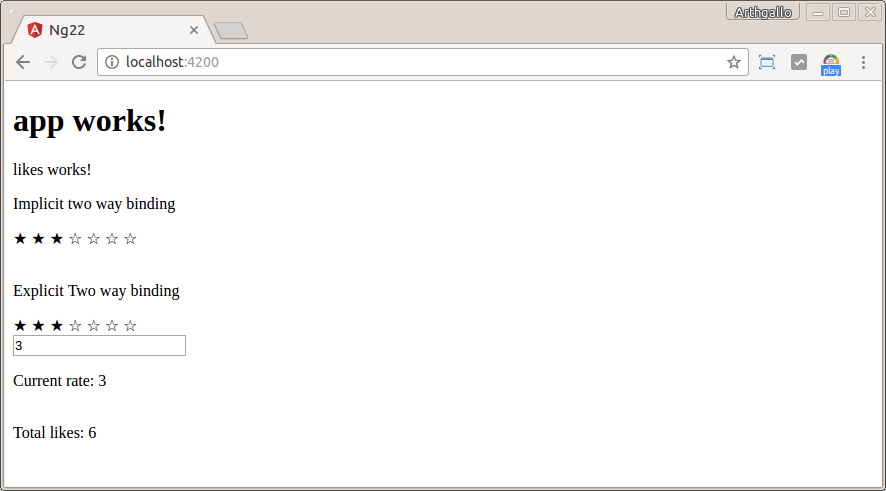
Angular2 project using angular-cli with property and event binding

In this setup I am going to walk-through setting up an Angular2 project using angular-cli. We are then going to create a project and show some simple event and property binding using Angular2 and typescript.

The project

Our project is simple. We will create a simple page with a heading, a label and 3 inputs. These are
  1. A page heading showing application state and most recent event
  2. A text label that shows value from the underlying component
  3. An input text field that also shows an initial value from the underlying component.
  4. An input clear button, that clears the value in the underlying component and also the label and input field
  5. An input reset button that sets everything back.
To demonstrate, we will load the page, and cycle through the 2 events. Lets get started...

The steps

First lets setup angular-cli

The step to do that is to run the following command in your target folder


sudo npm install -g angular-cli


This will create the appropriate setup ashown below


Next, we will create the project, I call mine "ng2-1". I will use the angular-cli directive "ng new" to create the new project..


ng new ng2-1


This command creates the necessary files needed for setting up the project, as we can see from the screenshot below..


Now that the project is created, we will open the created files in our favourite code editor and take a look at the generated seed project. I use Vscode, an open source editor from Microsoft that is also available for Ubuntu.

We need to add the created project to our editor.. We can do that by Opening the folder we created at the start, using the Open folder command..


Next I navigate to the root folder for the project, and click OK to start working...


We will now navigate to the appropriate files within the created project. This should be within the ./app/src folder, and the two files we will use are called app.component.ts and app.component.html


The presentation logic

The generated project created a app.component.html file which is our root component's html representation. The default setup just created a heading based on the root object's "title" property. We will add additional presentation logic in terms of the following

  • A label text "My name is ..." using for the myname property defined in the root object.
  • An input text field that takes in its value from the "myname" property defined in the root object (same as the label defined above).
  • A Clear button that calls the clearClick() function in the component class when clicked.
  • A Reset button that calls the resetClick() function in the component class when clicked.

Let's modify the system generated .html file as follows..Notice how the property binding is done by boxing the attribute in square brackets. The onXXX event is called by surrounding the XXX with parentheses, and calling the method name of the component class.

<h1>
  {{title}}
</h1>
  <label>My name is {{myname}}</label>
  <br/>
  <input name="txtName" type="text" [value]="myname"/>
  <input name="btnClear" type="button" value="Clear" (click)="clearClick($event)">
  <input name="btnReset" type="button" value="Reset" (click)="resetClick($event)">

The above code as shown in my editor


The application logic

The application logic is contained in the file called app.component.ts. The system generated code only has a single property called title, but we will extend the logic as follows:
  • A new property called myname
  • A constructor that simply logs an event
  • A clearClick() method that is called when Clear button is clicked. This logs on the console, sets the myname property to "", marks the clear button as disabled, as well as updates the title property to indicate that Clear button has been clicked.
  • A resetClick() method which called when reset button is clicked. This again logs on the console, resets the "myname" property to my name, and updates the title property to indicate that Reset button has been clicked.

import { Component } from '@angular/core';

@Component({
  selector: 'app-root',
  templateUrl: './app.component.html',
  styleUrls: ['./app.component.css']
})
export class AppComponent {
  title = 'app works!';
  myname = 'Arthgallo';
  isActive=false;
 
  constructor() {
    console.log("Starting now");
  }
  
  clearClick($event) {
    console.log("Clear clicked");
    this.myname = '';
    $event.target.disabled=true;
    this.title="Clear clicked!"
  }

  resetClick($event) {
    console.log("Reset clicked");
    this.myname='Arthgallo';
    this.title="Reset clicked!"
   }
}

This is how the code appears on my screen..


and finally the web page in action. This can be done by entering the command "ng serve" on the command line.


ng serve


By default the webpage can be accessed at http://localhost:4200.. Lets test our property and event binding.

1. Initial load


2. On clicking the clear button


3. And finally the reset button clicked


That's it..