- Installing the development tools,
- Creating a simple application
- Running the application on emulator and physical device
- Packaging the file for distribution.
Be aware that the application is not very sophisticated as the focus is on the development experience rather than the app.
Prereq Installation
Nativescript and Angular2 installation is a little more involved than other nodejs environments. This is primarily due to the Android environment dependencies. Here are the steps.- Enable virtualization on your BIOS for the emulators
- Install prerequisite libraries
- Install JDK and Android Studio SDK
- Install Nativescript

Here is the script for first 3 steps until the end of installing Android Studio and emulators..
# Set the current directory to INSTALL_DIR as we will need to come back here
export INSTALL_DIR="$PWD"

# kvm-ok is needed for the emulators to be installed. It checks if BIOS ..
# supports hardware accelerated KVM virtual machines. You may need to turn on
# hardware accelerated virtual machines in your BIOS
sudo apt-get install cpu-checker
sudo kvm-ok
# sudo apt-get install qemu-kvm libvirt-bin ubuntu-vm-builder bridge-utils

# Install pre-requisite libraries
sudo apt-get install lib32z1 lib32ncurses5 lib32bz2-1.0 libstdc++6:i386
sudo apt-get install g++

# Install JDK
sudo add-apt-repository ppa:webupd8team/java
sudo apt-get update
sudo apt-get install oracle-java8-installer
sudo update-alternatives --config java
export JAVA_HOME=$(update-alternatives --query javac | sed -n -e 's/Best: *\(.*\)\/bin\/javac/\1/p')

# Setup Android
mkdir -p ~/android
cd ~/android
wget -nc https://dl.google.com/android/android-sdk_r24.4.1-linux.tgz
tar -xvf *.tgz
export ANDROID_HOME=~/android/android-sdk-linux
sudo $ANDROID_HOME/tools/android update sdk --filter tools,platform-tools,android-23,build-tools-23.0.3,extra-android-m2repository,extra-google-m2repository,extra-android-support --all --no-ui
If for some reason, ANDROID_HOME is not added to your .bashrc path, we will also need to manually edit our .bashrc file to add the ANDROID_HOME and the Android tools permanently. For this, edit the .bashrc file in your root folder and add the following lines.
To open the .bashrc file
gedit .bashrc
Now add the following lines at the end.
export ANDROID_HOME=$HOME/android/android-sdk-linux
export PATH=$PATH:$ANDROID_HOME/tools
export PATH=$PATH:$ANDROID_HOME/platform-tools
In my execution, the setup could also not find lib32bz2-1.0. Replacing with libbz2-1.0:i386 worked, as shown below.
sudo apt-get install lib32z1 lib32ncurses5 libbz2-1.0:i386 libstdc++6:i386

Also, setting up Android Studio also requires setting up an emulator. Once the basic Android Studio is setup launch Android SDK manager and make sure that all components of your target API version are installed. To launch Android SDK Manager, enter
sudo $ANDROID_HOME/tools/android
The following screen shot was taken while installing the required API modules.

Testing the environment requires you to setup an Android Virtual device (AVD). For my development, I chose Nexus 6 as the prototype device. Android virtual device Manager can be launched by the following command.
$ANDROID_HOME/tools/android avd
Now we can create a new AVD.

Clicking on Create AVD will show a dialog box similar to one below. This shows the options that I selected to create the AVD on my machine.

Upon starting the AVD, I made sure the display is scaled to the correct size as well.

Nativescript installation
Nativescript installation is straightforward from this point on..cd $INSTALL_DIR sudo npm install nativescript -g --unsafe-perm export PATH=$PATH:~/.node_modules_global/lib/node_modules/nativescript/bin
tns info
tns doctor

Creating a new project
Now that everything is setup we can go ahead and create a new project. In the spirit of my previous posts on Angular2 and Typescript, I decided to name the project ng2-ns1. The following command creates a new project and adds android as one of the target platforms. Developing for iOS unfortunately is not possible on Ubuntu and other Linux variants.tns create ng2-ns1 --ng
cd ng2-ns1
tns platform add android
This creates an empty typescript based nativescript project with a base app.component.ts and an app.component.html file. I wanted to extend this behaviour by adding two new components, one for a home and another for a login control.
Unlike angular-cli, here the components have to be created by hand. So I did the following in my IDE
- Added a new folder called home and a folder called login under the app folder.
- Added files home.component.ts, home.component.html under /home and login.component.ts and login.component.html under /login folders
You can see the folder structure in the following screenshot.

Lets now go through each of these files one by one, starting with the login.component.
login.component.html
Here is the code for the login.component utilizing nativescript UI elements. Notice that:- Username and password both use the ngModel directive for two-way binding. This is way more chatty as each keystroke is submitted, but this is a native app, so ideally there is no round trip.
- The message label uses one way binding
- The submit button uses an event binding to call a login() function.
- StackLayout functions like a div tag in html.
<StackLayout>
    <Label text="login" class="h2 text-center"></Label>
    <TextField [(ngModel)]="username" class="" hint="Email Address" keyboardType="email" autocorrect="false" autocapitalizationType="none"></TextField>
    <TextField [(ngModel)]="password"  class="" hint="Password" secure="true"></TextField>
    <Label [text]="message" class="h3 text-center" textWrap="true"></Label>

    <Button text="Login" class="btn btn-primary btn-active" (tap)="login()"></Button>
    <Button text="Sign-up" class="btn"></Button>
</StackLayout>
login.component.ts
This file simply checks for a hard-coded username and password, entered by the user. Important to see a few differences from Angular2 + Typescript for web here.
- We don't need to decorate the properties as Input or Output properties.
- We don't create a form element for username and password. Rather, Form submissions are handled through ngModel directive rather than implicit ngForm
- We throw the loggedIn event using an event emitter once the login is successful.
import {Component, OnInit, EventEmitter} from '@angular/core';

@Component({
    selector: "login",
    templateUrl: "./login/login.component.html",
    styleUrls:["./login/login.component.css"]
})
export class LoginComponent implements OnInit{

    username:string;
    password:string;
    maxtries:number = 3;
    loggedIn = new EventEmitter();
    isLoggedIn:boolean = false;
    loginAttempt: number= 0;

    _valid_user:string = "tom";
    _valid_pwd:string = "jerry";

    constructor() {

    }

    ngOnInit() {

    }

    public counter: number = this.maxtries;

    public get message(): string {
        console.log("username="+this.username+", password="+this.password);
        if(this.counter == 0)
        {
            return "Enter username/ password. You have a maximum of " + this.maxtries + " attempts";
        } else if (this.counter > 0
                && this.isLoggedIn) {
            return "Welcome!";
        } else {
            return "Invalid username/ password. "+ "username="+this.username+", password="+this.password+". "+this.counter + " attempts left";
        }
    }

    public login() {
        console.log("Login.login() pressed");
        console.log("username="+this.username+", password="+this.password);
        if ( (this.username == this._valid_user)
                && (this.password == this._valid_pwd)) {
            this.isLoggedIn = true;
            this.loggedIn.emit();
        } else {
            this.counter--;
        }
    }
}
Home component
Next, is the home component that simply is a container for the login component. My intention was to use the *ngIf directive to load or not load the login component, but the nativescript compiler did not like ngIf. I will research more and update this post as neccessary.home.component.html
This markup simply loads the login component. As mentioned previously, I wanted to include a *ngIf directive to control the display of login component if user was already logged in, but that did not work. I can catch the loggedIn event raised by the login component and set a property of the home component.<Label text="Version 0.03"></Label> <login (loggedIn)="onLogin()"></login>
home.component.ts
The home.component.ts file simply has a property that is set once the loggedIn event raised by the login component is caught by the home component.import { Component, OnInit} from '@angular/core'; @Component({ selector: "home", templateUrl: "./home/home.component.html", styleUrls: ["./home/home.component.css"] }) export class HomeComponent implements OnInit{ unauthenticatedSession:boolean = true; constructor() { } ngOnInit() { } onLogin() { this.unauthenticatedSession=false; } }
App Component
Finally, we get to the AppComponent. These are also simple.app.component.html
<StackLayout class="p-20">
    <Label text="Hello Nativescript" class="h1 text-center"> </Label>
    <home></home>
</StackLayout>
app.component.ts
import { Component } from "@angular/core";

@Component({
    selector: "my-app",
    templateUrl: "app.component.html",
})
export class AppComponent {

}
app.module.ts
Among the app classes, the app module is the only one that has some behaviour.- We import NativeScriptFormsModule to allow ngModel directives to work. Without this module, the two way binding won't work.
- We import the AppComponent, HomeComponent and LoginComponent as well.
import { NgModule, NO_ERRORS_SCHEMA } from "@angular/core";
import { NativeScriptModule } from "nativescript-angular/platform";
import { NativeScriptFormsModule } from "nativescript-angular/forms";

import { AppComponent } from "./app.component";
import {HomeComponent} from './home/home.component';
import {LoginComponent} from './login/login.component';

@NgModule({
    declarations: [AppComponent,
                    HomeComponent,
                    LoginComponent],
    bootstrap: [AppComponent],
    imports: [NativeScriptModule,
                NativeScriptFormsModule],
    schemas: [NO_ERRORS_SCHEMA]
})
export class AppModule { }
Running the program
I ran the program on the emulator as well as a physical Samsung S5 connected via USB to my machine. Both cases the program ran successfully, and the physical phone is much faster for testing quickly. The commands are as follows:# Run the program on emulator tns run android --emulator #Run the program on emulator in livesync mode to allow app to refresh on code change tns livesync android --emulator --watch # Run the program on physical device tns run android #Run the program on physical device in livesync mode tns livesync android --watch
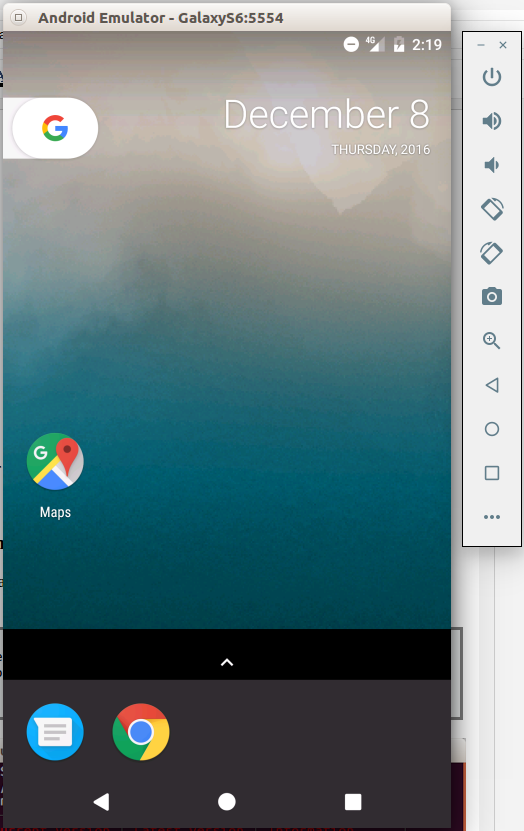
Here is the application running on the Emulator

Here is the same app running on a Galaxy S5 physical device

Packaging and distribution
Finally, we come to the task of packaging file for distribution. It is done in 3 easy steps- Prepare the environment
- Generate a keystore
- Build the final distribution
#Prepare the environment
tns prepare android

#Generate a keystore
keytool -genkey -v -keystore my-release-key.jks -keyalg RSA -keysize 2048 -validity 10000 -alias some_alias

# Build
tns build android --release --key-store-path $PWD/my-release-key.jks --key-store-password some_password --key-store-alias some_alias --key-store-alias-password some_password
This creates a build as shown below

Finally, we can publish the app on Google Play, by signing in to https://play.google.com/apps/publish/signup/ and paying $25.

That's it!
No comments:
Post a Comment