I wanted to create a new set of
transformations that I was constructing for a project. For the same,
I set up GeoKettle, a spatial ETL tool. Starting Kettle I was always
wondered what the Central repository was. As I browsed through some
old threads on user forums, I understood that Kettle repository was
for centralizing your jobs and transformations across projects and
users into a single place, so anyone could execute them.




That seemed like a good idea. However,
most older posts had some concerns around its stability. Realizing
that these concerns were probably five years or so old, I decided to
set it up anyway.
First step is to create a Postgresql
database user. For this, we need to first login as the postgres user
within the Ubuntu environment and connect to the postgres
> su - postgres

Next we login to the psql environment
and create a database level user called kettleadmin.
postgres > psql
psql > create user kettleadmin with
password 'kettleadmin';

We then create a database called
kettledb and we will grant all access to this database to user
kettleadmin.
psql > create database kettledb;
psql> grant all on database
kettledb to kettleadmin;
Now that we have setup the database, we
can setup the kettle repository.
First step is to launch the GeoKettle
shortcut. That brings the dialog box to choose your repository.

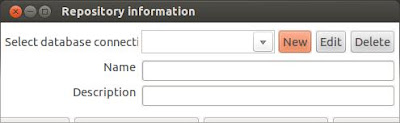
Now click the button for “New” to
make a new repository, and click again on the following dialog box to
create a new database connection.

On clicking the new button, another
dialog box appears. Select Postgresql as the database
connection type. Next, we specify the connection parameters to the
database we have just created using credentials for kettleadmin as
shown below

Click on “Test” to make sure the
connection parameters are correct.

Once done, enter the additional details
like name and description, and click “Create or Upgrade” to
create the repository for the first time.

Once executed, the application will
provide a list of commands executed.
Next, access the original command
window and enter the default Login name and password for the
database, which is admin/admin. Click on OK.

Now, on the dialog that appears, you
can click on the top menu item “Repository” and click on link to
“Explore Repository”.

This launches a window, where we can
make changes to the current repository. The first step would be to
add a new user for myself, to ensure I don't corrupt the
configuration while working. I can do this by selecting the Users
link and right clicking to select “New User” from the context
menu.

Now I can configure this the way I
want, to add new users. We are all set to move forward.


