Search This Blog

Thursday, January 31, 2013

Download and Install PostGIS 2.x on Ubuntu 12.x


In this post, we will walk through the steps for downloading and installing Post GIS. This of course assumes that you have Postgresql already installed and running on your machine. Note: In my post, I have provided the complete script for downloading and building all extensions and the actual stuff towards the end, so no need to copy individual steps. However, I will still walk through these interactively as well.

The first step is to download and install PostGIS from source. Open a command window and type the following to get the latest version of PostGIS source.

The latest version of the software is available at the following url.
http://download.osgeo.org/postgis/source/postgis-2.0.2.tar.gz

We will also need some additional libraries to set up projection, spatial analysis and other similar support by entering the following.

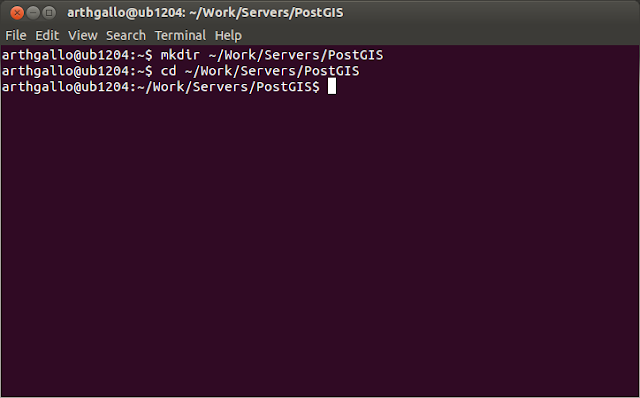
mkdir ~/Work/Servers/PostGIS
cd ~/Work/Servers/PostGIS


Prior to getting the actual PostGIS source and building it, we would need to obtain several extensions that are needed to get the complete functionality. Since these need to be downloaded and installed first, we will create a folder for extensions and compile all these prior to getting the PostGIS sources and building it.


mkdir extensions
cd extensions

wget http://download.osgeo.org/proj/proj-4.8.0.tar.gz
tar -xvf proj-4.8.0.tar.gz
cd proj-4.8.0
./configure
make
sudo make install


We also need the geos library to support the various geometry functions. This is available from the geos website using the following set of commands.

cd ..
wget http://download.osgeo.org/geos/geos-3.3.7.tar.bz2

tar -xvf geos-3.3.7.tar.bz2
cd geos-3.3.7
./configure
make
sudo make install


Another library that is important is libxml2 that can provide support for GML conversion functions. This can be obtained from the libxml2 website. The source files are located on the ftp site, and we can install these using the following commands.

cd ..
wget ftp://xmlsoft.org/libxml2/libxml2-2.9.0.tar.gz
tar -xvf libxml2-2.9.0.tar.gz
cd libxml2-2.9.0
./configure
make
sudo make install


Next, we need to get the libraries for importing and exporting data as GeoJSON. The website is http://oss.metaparadigm.com/json-c/.

The script for getting the stuff is as follows.

cd ..
tar -xvf json-c-0.9.tar.gz
cd json-c-0.9
./configure
make
sudo make install


Next, we need to get the latest version of gdal libraries to add raster support.

cd ..
wget http://download.osgeo.org/gdal/gdal-1.9.1.tar.gz
tar xvzf gdal-1.9.1.tar.gz
cd gdal-1.9.1/
./configure
make
sudo make install


Finally, we can get the postgis source and build it.

cd ../..
wget http://download.osgeo.org/postgis/source/postgis-2.0.2.tar.gz
tar -xvf postgis-2.0.2.tar.gz
cd postgis-2.0.2
./configure --with-gui --with-raster --with-topology
make
sudo make install


Here is the complete script as promised. Please change to match your environment.

mkdir ~/Work/Servers/PostGIS
cd ~/Work/Servers/PostGIS
mkdir extensions
cd extensions

wget http://download.osgeo.org/proj/proj-4.8.0.tar.gz
tar -xvf proj-4.8.0.tar.gz
cd proj-4.8.0
./configure
make
sudo make install

cd ..
wget http://download.osgeo.org/geos/geos-3.3.7.tar.bz2
tar -xvf geos-3.3.7.tar.bz2
cd geos-3.3.7
./configure
make
sudo make install

cd ..
wget ftp://xmlsoft.org/libxml2/libxml2-2.9.0.tar.gz
tar -xvf libxml2-2.9.0.tar.gz
cd libxml2-2.9.0
./configure
make
sudo make install

cd ..
wget http://download.osgeo.org/gdal/gdal-1.9.1.tar.gz
tar xvzf gdal-1.9.1.tar.gz
cd gdal-1.9.1/
./configure
make
sudo make install

cd ../..
wget http://download.osgeo.org/postgis/source/postgis-2.0.2.tar.gz
tar -xvf postgis-2.0.2.tar.gz
cd postgis-2.0.2
./configure --with-gui --with-raster --with-topology
make
sudo make install


Hope this sets up PostGIS on your machine. To make sure, login to psql and fire the following command.

psql> SELECT name, default_version,installed_version
FROM pg_available_extensions WHERE name LIKE 'postgis%' ;

This should return postgis and postgis_topology as the two matching extensions installed.


Spatially Enabling your database

Now to enable spatial extensions on a database of your choice. The steps are easy. Login as the postgres user to the OS. Connect to the database of your choice that you want to spatially enable as the postgres user and run the create extension sql statement.

Here are the commands

> su – postgres

postgres> psql -d <your_data_base_name>

psql> create extension postgis;


If everything is set up correctly, this should work like a charm.

For me it did not. What I did to resolve the issue will be the subject of my next post.

Sunday, January 27, 2013

Creating a Kettle Repository

I wanted to create a new set of transformations that I was constructing for a project. For the same, I set up GeoKettle, a spatial ETL tool. Starting Kettle I was always wondered what the Central repository was. As I browsed through some old threads on user forums, I understood that Kettle repository was for centralizing your jobs and transformations across projects and users into a single place, so anyone could execute them.

That seemed like a good idea. However, most older posts had some concerns around its stability. Realizing that these concerns were probably five years or so old, I decided to set it up anyway.

First step is to create a Postgresql database user. For this, we need to first login as the postgres user within the Ubuntu environment and connect to the postgres

> su - postgres


Next we login to the psql environment and create a database level user called kettleadmin.
postgres > psql
psql > create user kettleadmin with password 'kettleadmin';


We then create a database called kettledb and we will grant all access to this database to user kettleadmin.

psql > create database kettledb;
psql> grant all on database kettledb to kettleadmin;

Now that we have setup the database, we can setup the kettle repository.
First step is to launch the GeoKettle shortcut. That brings the dialog box to choose your repository.


Now click the button for “New” to make a new repository, and click again on the following dialog box to create a new database connection.


On clicking the new button, another dialog box appears. Select Postgresql as the database connection type. Next, we specify the connection parameters to the database we have just created using credentials for kettleadmin as shown below


Click on “Test” to make sure the connection parameters are correct.


Once done, enter the additional details like name and description, and click “Create or Upgrade” to create the repository for the first time.


Once executed, the application will provide a list of commands executed.
Next, access the original command window and enter the default Login name and password for the database, which is admin/admin. Click on OK.


Now, on the dialog that appears, you can click on the top menu item “Repository” and click on link to “Explore Repository”.


This launches a window, where we can make changes to the current repository. The first step would be to add a new user for myself, to ensure I don't corrupt the configuration while working. I can do this by selecting the Users link and right clicking to select “New User” from the context menu.


Now I can configure this the way I want, to add new users. We are all set to move forward.


Saturday, January 26, 2013

Download and Install Fiddler for Ubuntu (NetTool)


I was looking for an alternative for Fiddler for Ubuntu and I found a tool that was highly recommended wherever I looked. Its called NetTool and it is a java based program.

Download NetTool

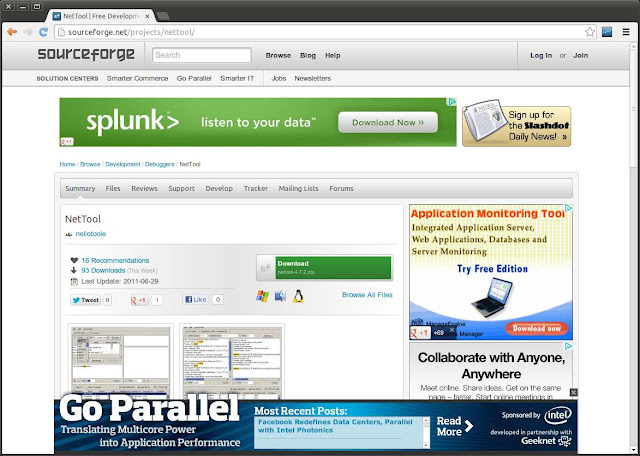
NetTool is available from http://sourceforge.net/projects/nettool/. The page contains some description as well as a download link for getting the zip file.


Clicking on the download link, I saved the tool to my local machine under a NetTool folder that I had created.


Right clicking on the zip file, select the option to extract it.


Open a terminal window and navigate to the folder where the file was extracted.

First step is to enter a command to make the shell script files executable.

> chmod a+x *.sh


Now enter the command to start nettool.

> ./start-nettool.sh


This launched the nettool application that looks as following.


Now to enter the first real test. Accessing the content of a page directly.

Accessing a URL from within NetTool

Enter a URL (say, www.google.com ) on the first text box on the top-left and the console will show the html contents of the page as below.


Using the browser to navigate the site.

The next logical step is to see how we can configure our environment to work like fiddler. Fiddler, as windows developers must have experienced, allows users to enter the URL directly on the browser and the browser can continue to process the javascript or Flash/Silverlight content, where as Fiddler can log the http traffic going back and forth.

This is also possible with this tool. To test, I first configured my setup as follows. We select a “TCP tunnel” tab on the application and we enter the following details.
Listen On: All Local Addresses
Port: 7000
Tunnel to: here.com
Port:80
Then click on “Listen” as shown below


Now enter, http://localhost:7000 on your browser and Nettool will tunnel through to http://here.com as shown below

The NetTool window shows the actual content going back and forth.


Works like a charm. Not quite Fiddler but close enough.


Thursday, January 24, 2013

Setting up Postgresql for Accepting Password Connections

I was setting up a new machine with a fresh postgresql install, and I had just created a new user account. As I tried to login to psql from the terminal window, I got the dreaded message informing me that the authentication failed. I realized, I had not set up my environment to accept local connections for different users. So in this post, let us see how to do that.
While the steps shown here are for PostgreSQL 9.1, they are valid for 9.3 as well.

First, the following screen will show the kind of error I received. Note that the user 'nyadmin' had been created while logged in as the postgres user. You can also see that I tried multiple attempts to login before realizing that this was a fresh installation.


Allowing trusted connections to Postgresql

The file that allows the administrator to manage which users can connect and which cannot, is called pg_hba.conf. I have seen this move around to different locations for different versions of the database, but currently in my environment it was deployed under /etc/postgresql/9.1

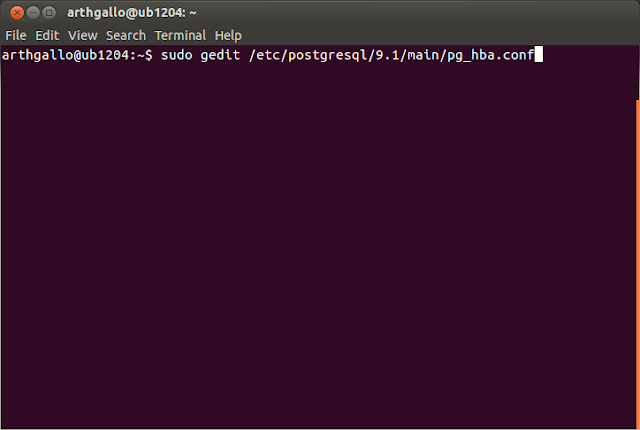
We need to edit this file as an administrator, since my user does not have rights to save the file within the etc folder. Hence, we need to use sudo before the gedit command as follows.

> sudo gedit /etc/postgresql/9.1/main/pg_hba.conf


We need to edit the file to make following changes

  1. Changed postgres authentication to identity from peer
  2. Changed local authentication to md5 from peer

This means that I will need to become OS level postgres user to connect to Postgres. Also, locally connecting users can now enter their passwords to connect the database.

You can see the changes in the screen shot below. I commented the previously existing privileges to highlight the changes.

First, the line....
local all postgres peer
....was commented, with a “#' and the following line added below it
local all postgres ident

Then, the line....
local all all peer
....was commented, with a “#' and the following line added below it
local all all md5


With these changes, we can save the file and close the editor. Next we need to restart the database service.

Restarting Postgresql service

For restarting the service, we need to first switch to the postgres OS level user. This can be done by entering .....

> sudo -u postgres service postgresql restart

..... or you can do it in two steps, as shown below.

> su – postgres


System will prompt for the postgres user password, which is postgres by default. Once in, you can issue the restart command as follows

postgres > service postgresql restart


Enter command “exit” to come back to the original prompt. Now enter the command to login as the created user.

> psql -U nyadmin -d template1 -W


Here,
-U denotes the user,
-d tells the system which database to connect to. Since I have not yet configured a default database for this user, I need to explicitly mention template1
-W tells the system that use a password.

The system prompts for the password, which I entered, and we are in.


In the next post, we will create a default database for this user.

Friday, January 18, 2013

Adding Postgresql support to Pentaho BI Server Community Edition

At the start of a new project, I wanted to use postgresql database as my database repository for a BI dashboard project. I had selected Pentaho as the BI Server of choice along with its associated components. Previous posts have walked through the installation of the Pentaho BI Server Community Edition on a Ubuntu box as well as Installation of Dashboard tools on Pentaho BI Servers Community Edition.

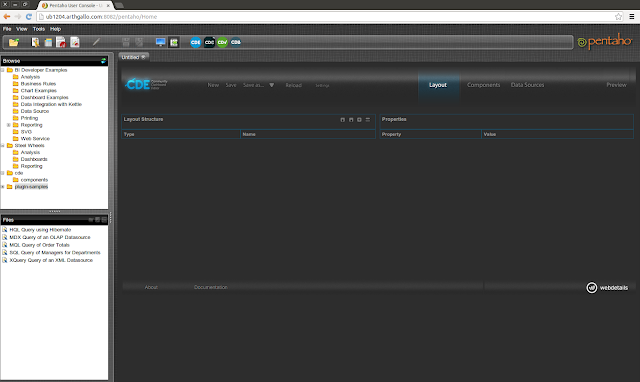
I launched the Pentaho BI Server and accessed the Community Data Dashboard to see the default dashboard.


The first step is to add a data source, which I did my accessing File> New > Data Source on the top level menu for Pentaho BI Server.


This brings the following page, where I selected Database Table(s) as the option.


Selecting Database Table(s) brings the following options, where I gave the database name and the option that I wanted to use the data source for reporting and analysis.


At this point, it also lists the available connections on the Pentaho server environment. To add a new connection, you need to click on the + button to the right of list of data connections, that is a green circular button with a plus sign.

Clicking on the button brings the following dialog box to define a new connection.


As you can see, Postgresql is not a supported option. Thankfully, they have provided a link for Adding Databases, which is a help link that provides the information needed. It suggests that to add support for a new database, it has to be deployed and configured in multiple places, and provides the list of places where changes need to be made.


Here is a step by step description of what all I did.

Downloading the Postgresql JDBC drivers

First step was to download the Postgresql JDBC drivers. Postgresql JDBC drivers are available at http://jdbc.postgresql.org/download.html


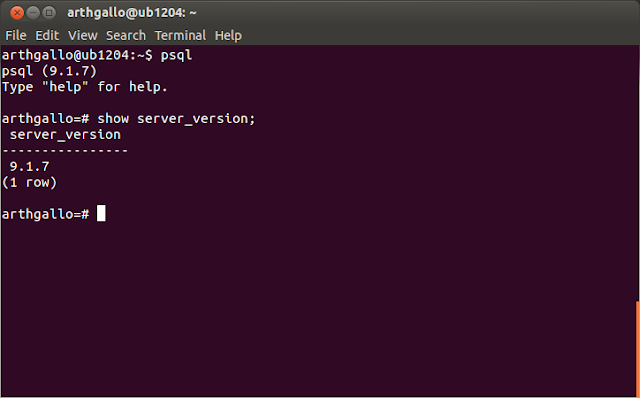
The page provides links to the latest drivers as well as older drivers. To ensure I was getting the right version of the drivers, I opened a new terminal window, launched Postgresql and typed the command to get the version.

> psql
psql > show server_version;


So I downloaded the JDBC drivers for Postgresql 9.1 from the website and copied them to the folder where I could access them.


Before copying them over to the pentaho location, I had to shutdown the Pentaho server, which I did by issuing the stop command in the Pentaho installation folder.

> ./stop-pentaho.sh


I copied the driver jar file to the first location below.

//Work/Servers/Pentaho/biserver-ce/tomcat/lib


I also copied postgresql to the administration-console folder for pentaho.


Then, I restarted the Tomcat server and retraced my steps to define a new connection as shown earlier in this post by accessing File > New > Data Source on the menu and clicking on the option to add a new connection.

On the connections dialog box, we can now see the option to add Posrgresql as a valid data source.

Adding all the details in for the connection, we can add the connection to the environment.

Now we can configure our portal using postgresql data.