Search This Blog

Showing posts with label Linux. Show all posts

Wednesday, October 24, 2012

Download and Install GeoServer on Linux


In this post, we walk through the steps of installing GeoServer 2.2 on Tomcat 7 on Ubuntu 12.04.

First thing is to setup Tomcat 7 on Ubuntu as indicated in my previous blog (http://opendesignarch.blogspot.com/2012/10/how-to-install-tomcat-7-on-ubuntu-1204.html)

As part of the default install on Ubuntu, two Tomcat 7 locations are created. The first is /var/lib/tomcat7 and the second is /usr/share/tomcat7. While the first folder contains all the configuration folders, the second contains the runtime components.

Listing the contents of /var/lib/tomcat7, we see the folder contents that includes the webapp directory. This is the directory where we will install GeoServer.

> ls /var/lib/tomcat7


Now, lets download the Geoserver binaries. If we navigate to the GeoServer site, we shall see the following page by clicking the Download link.


We are interested in the Stable build. Also, get the Web Archive (.war) file.
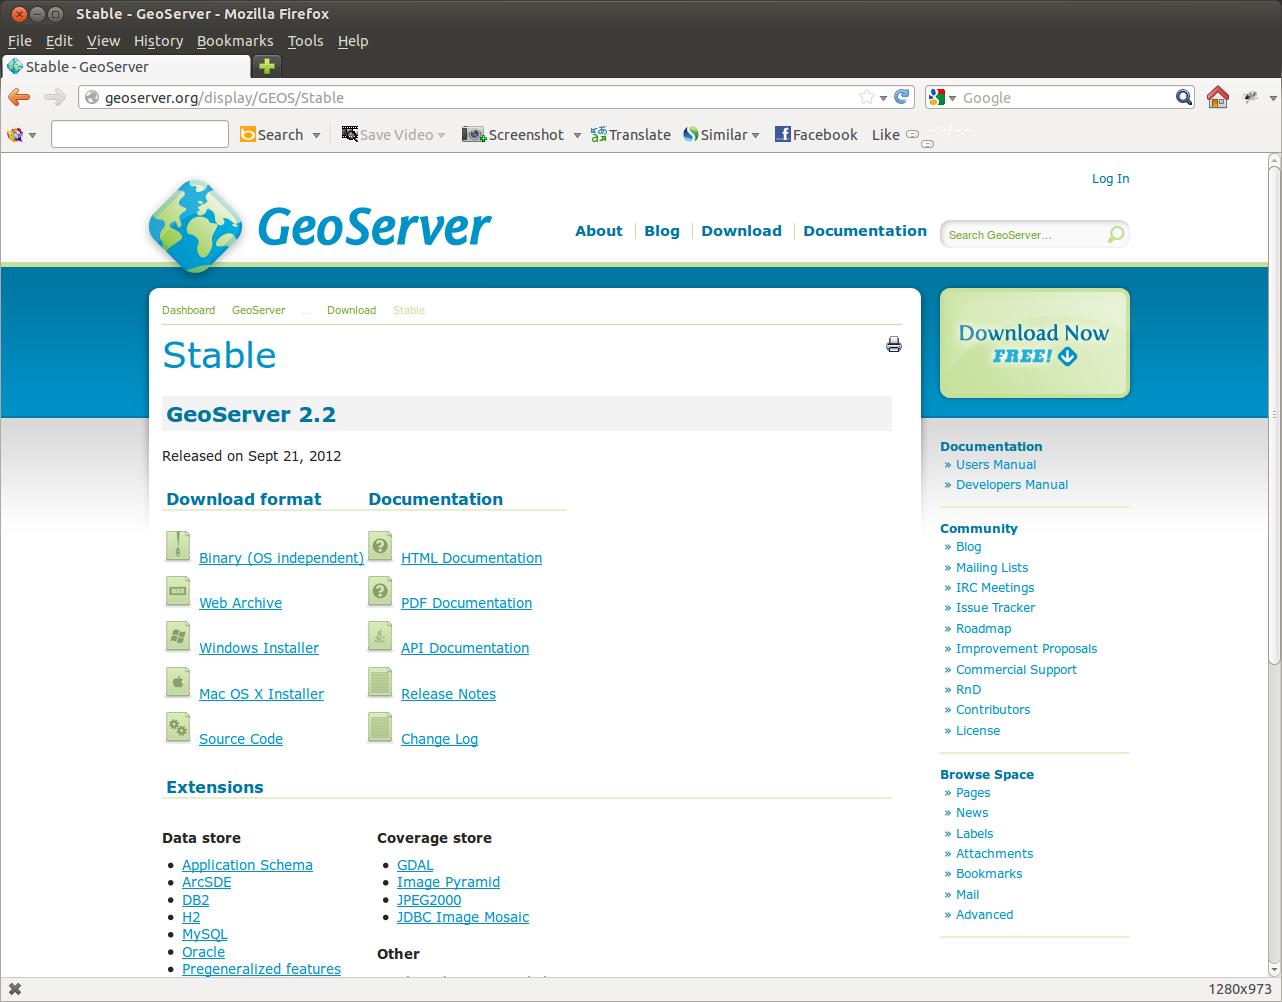


Go ahead and download the web archive. I copied the installation zip to my local file.


Go ahead and extract the zip file. This will give you the .war file. You can delete the zip now.


Now open a terminal window and copy the extracted .war file from within the extracted folder to the tomcat7/webapps folder

For example, for me its the following

> sudo cp /home/arthgallo/Work/Servers/GeoServer/geoserver-2.2-war/geoserver.war /var/lib/tomcat7/webapps


Once the file is copied, Tomcat will automatically load it as a web application. We can test by entering the following url in a browser.

http://localhost:8080/geoserver


Enter the username password as “admin” and “geoserver” and click the login button to login.


Voila, we can access the administration console for Geoserver 2.2.


Take care...

Monday, October 22, 2012

Configuring administration on Tomcat 7


In a previous blog (http://opendesignarch.blogspot.ca/2012/10/how-to-install-tomcat-7-on-ubuntu-1204.html), I walked through the steps of installing Tomcat 7 on Ubuntu. In this post, I would like to enable administrator access to allow deployment of webapps or Web Archive (.war files). Lets go through the steps.

When you access the default Tomcat 7 Administration page on http://localhost:8080/manager  or similar, you will see a username password prompt. Cancelling it you will see a screen like below.


As indicated, we need to install tomcat7-admin page to access the manager webapp. As shown in the last step of our previous post, this is done as following...

We will also need to obtain the tomcat7-admin package by entering the following

> sudo apt-get install tomcat7-admin


If we now do a search for all folders in /usr/share prefixed with tomcat we should see the following

tomcat7
tomcat7-admin
tomcat7-root

> ls /usr/share/tomcat*


Also, if we browse the folder /var/lib/tomcat7, we should see the faimilar structure from previous generation Tomcat instances

> ls /var/lib/tomcat*


To configure administration, we need to enable the manager. Clicking on the link for manager in the Tomcat home page (http://localhost:8080/manager), will show the following screen with the steps to be followed.


As indicated, the conf folder is installed under /var/lib/tomcat7. Lets go there and open the tomcat-users.xml file for editing as follows

> cd /var/lib/tomcat7/conf
> ls
> sudo gedit tomcat-users.xml


This should open the file for editing. Add the following lines

<role rolename="manager-gui"/>
<user username="manager" password="manager" roles="manager-gui"/>


Save the file and exit

Next, restart the tomcat7 service from the command line as follows.

> sudo /etc/init.d/tomcat7 restart

The service should stop and restart.


Next access the page http://localhost:8080/manager

You will see a prompt to enter the username and password for the manager. Go ahead and enter the username/ password we just created. In my case it was manager/ manager.


Voila, we can see the Tomcat administration screen as shown below.


There you go!

Monday, October 15, 2012

Setting up Postgresql for the default OS user


I tried accessing Postgresql user from my default login on Ubuntu (this is not a sudoer level user) and was unable to do so.

> psql

Gave the following response


So, I needed to add the currently logged in Ubuntu user to the postgresql list of users. For that I switched to the postgres user by entering the following and the postgres user password in the response.

> su – postgres

That made postgres user the current user in my Ubuntu session.


Now, to add the database user for current user as follows:

> createuser --superuser arthgallo

Where arthgallo is my OS level user name


Now, we need to enter the password for this database level user. For that, lets login to the psql prompt using the postgres user.

At the psql prompt, enter the command to update the password for arthgallo user.

psql > \password arthgallo


Enter your OS level password twice

Now quit the psql prompt using '\q' and 'exit' from the postgres user by entering 'exit'. Thus should bring you back to the OS level prompt for your user (arthgallo) in my case.

Enter the command to create the default database

> createdb arthgallo


Now start the psql prompt, and you should be connecting to postgresql session with your default database.


That's it!!