Search This Blog

Showing posts with label Tomcat 7. Show all posts

Tuesday, February 17, 2015

Installing GeoServer 1.6.2 on Tomcat on Ubuntu

In this post, we will deploy GeoServer latest release on Tomcat on Ubuntu. The first thing to do is to download the installer by accessing the GeoServer website at http://www.geoserver.org/download/


Here we can choose to download the version we want. To deploy on Tomcat on my machine, I need to download the Web Archive (.war) version. Click on the link that says Web Archive. In case you also need to install Tomcat on your machine follow the steps in my earlier post on Installing Tomcat 7 on Ubuntu.


This downloads a zip file containing the .war file. Having downloaded it, we need to copy it to a place where we can extract it to unzip the contents.


On my machine the default Tomcat instance is deployed at /usr/share/tomcat7 and accessible at http://localhost:8080. We can launch a browser to verify its working.


Next I need to go to the Tomcat bin directory to check the Tomcat version. For that enter the following command

cd /usr/share/tomcat7/bin/

Then execute the following command

./version.sh

to check the version.


Next we need to copy the .war file from the place you extracted the zip file into the Tomcat 7 webapp folder. If you installed Tomcat using Ubuntu apt-get command, the webapps folder would be under /var/lib/tomvat7/webapps.

If you extracted the files at /tmp the command would be as follows

sudo cp /tmp/geoserver-2.6.1-war/geoserver.war /var/lib/tomcat7/webapps


You may be prompted for your password.


This deploys GeoServer on your local Tomcat instance that can be accessed by entering the following url on your machine

http://localhost:8080/geoserver


That's it. Thanks!

Friday, December 14, 2012

Install Community Dashboard Tools on Pentaho BI Server 4.5 Community Edition

Soon after installing and setting up Pentaho Community Edition on my box, I realized that it does not ship with a dashboard tool. That has to be installed from another project called CTools.

Downloading CTools

CTools is available at http://www.webdetails.pt/index.html#ctools. Once you access this URL, you will access the following page.

The page contains a link to download Ctools bundle. Accessing that link shows the following page on the Github site.


We can download the shell script and the README.txt file to our local folder. I must warn that saving the ctools-installer directly from the browser and right clicking, actually gave me the html of the current page, rather than the file. For downloading the file, I had to click the file, go into edit mode and copy-paste the contents to a local shell script file.

Anyways, I downloaded it to a folder called ctools under my Pentaho folder. The first thing is to make ctools executable. This is done by entering the following command on the command line in a terminal window.

> chmod a+x *.sh


The next thing we need to do is to run the installer with the correct parameters. This is done, as shown below.

> ./ctools-installer.sh -s pentahoServer/biserver-ce/pentaho-solutions -w pentahoServer/biserver-ce/tomcat/webapps/pentaho

On my machine, the above works out to the following.

> ./ctools-installer.sh -s ~/Work/Servers/Pentaho/biserver-ce/pentaho-solutions -w ~/Work/Servers/Pentaho/biserver-ce/tomcat/webapps/pentaho


Executing the above script, we can see that the script downloads the necessary files needed for the installation. The script prompts to replace several of the existing scripts that I accepted, as show below.


Once the prompts are through, the installation starts and finally it is done!


Now we need to start the embedded tomcat instance contained within Pentaho dashboard, and we can see that upon logging in as a user, we can access additional links for Community Dashboards (called CDB, CDV, CDE and CDC).


Accessing link for CDE (Community Dashboard Editor), the user can now define their own dashboards as shown below.


That's it. We have successfully installed Community Dashboards on Pentaho Community Edition. In the next post, we will see how to configure a dashboard.

Sunday, December 2, 2012

Download and Install OpenSSO on Ubuntu


Installing OpenAM (OpenSSO) on Tomcat 7 on Ubuntu 12.04

For a project recently, I wanted to integrate OpenSSO with Joomla and Tomcat. The first step was finding and installing OpenSSO. Problem was I could not find where to download OpenSSO from. Turns out Oracle killed OpenSSO as a download a few years ago, and it has been re-incarnated as OpenAM or Open Access Management.

First step was to download and install OpenAM. And this is the topic of this blog post.

Pre-requisites and Downloads

I am assuming that Tomcat 7 is already installed on your Ubuntu box. If not, follow the steps outlined in my previous post http://opendesignarch.blogspot.com/2012/10/how-to-install-tomcat-7-on-ubuntu-1204.html

Now lets proceed with installing OpenAM. Open a browser windows and access the website http://openam.forgerock.org/


 Access the download page link from the main web site. (http://forgerock.org/openam.html)


I downloaded the latest Stable version called OpenAM 10.0.0


Access the Install Guide as part of the site Wiki

We will follow the Install guide step by step to setup the Open AM environment. First step is to copy the downloaded file to a location, where we can extract it....


Interestingly, unzipping the zip file creates a folder called opensso, as shown below


Ensuring a Fully Qualified Domain Name

The next step as per the install guide is to ensuring that the machine has a fully qualified domain name. That is easy to do. Open a terminal window on Ubuntu and type the following.

> sudo gedit /etc/hosts

This ensures that we can edit the hosts file.


Now make a fully qualified domain entry in the hosts file for the 127.0.0.1 IP address. Mine looks as follows

127.0.0.1 ub1204.arthgallo.com


Now save the file and exit. Just to make sure, we have got everything setup correctly, open a browser window and type the fully qualified domain name you just created.


And, I see the following page, from my local Apache installation.


Not only that, I can also enter

http://ub1204.arthgallo.com:8080/ and I can see my Tomcat installation.


Configuring Tomcat 7 prior to installation

It is important that the Tomcat 7 instance is able to handle the memory requirements for OpenAM. In order to achieve this, we need to first shut down Tomcat and alter some configuration parameters. To stop the Tomcat service enter the following on the command line.

> sudo /etc/init.d/tomcat7 stop


Now, we need to edit the configuration parameters such that there is adequate memory for OpenAM to load correctly.

To do this we must change the JAVA_OPTS that are used to run the process. Navigate to /usr/share/tomcat7/bin folder and open the file setenv.sh in a text editor.

It is important to confirm, why we are editing the setenv.sh file, when the first instinct is to change the JAVA_OPTS in the startup.sh file. However, that points to catalina.sh. The file catalina.sh clearly states that any Java parameters for Tomcat should be altered through the CATALINA_OPTS parameter. Further, we find that catalina.sh suggests that any custom changes be done through a setenv.sh file so it can be maintained going forward. Hence, the reason for editing the setenv.sh file.

> cd /usr/share/tomcat7/bin

> sudo gedit setenv.sh


In my case, the setenv.sh file did not exist previously. So the editor created a new file with that name. Now add the following lines in the setenv.sh file

CATALINA_OPTS="$CATALINA_OPTS -Xmx1024m -XX:MaxPermSize=256m"


Next, save and close the file. Once, we closed the file it is very important to give execute permissions to setenv.sh. We do this by entering the following on the command prompt.

> sudo chmod a+x *.sh


We can confirm that the setenv.sh has now been marked as an executable.


Copying over the .war file

Now, I can deploy the openam.war simply by copying the .war file that is included in the distribution into the Tomcat webapps folder as below.

On my machine the webapps folder is at /var/lib/tomcat7, and I unzipped the contents of the OpenAM download at ~/Work/Servers/OpenAM. The deployable .war file is at the location ~/Work/Servers/OpenAM/opensso/deployable-war.

> cd ~/Work/Servers/OpenAM/opensso/deployable-war

> sudo cp opensso.war /var/lib/tomcat7/webapps


Now that the deployable .war file is copied, it is time for the next step.

Giving tomcat7 user write permissions

The next step that is very important is to give the Tomcat user write permissions on the tomcat folder. Turns out that this does not happen by default.

We need to issue the following commands on the command prompt.

> sudo chgrp -R tomcat7 /usr/share/tomcat7
> sudo chmod -R g+w /usr/share/tomcat7


Starting the Tomcat 7 service

Before starting the service, I wanted to make sure that the new configuration parameters for Java run time actually took effect. So, I took a quick look at my CPU and memory before starting the Tomcat 7 process. It looked like this...


Now lets start Tomcat7. We can start the service as follows

> sudo /etc/init.d/tomcat7 start


Now we can see the impact on memory, of our configuration changes.


Configuring OpenAM

Next step is to configure OpenAM. It is very important to access the browser with the fully qualified domain name.


In my case, it is http://ub1204.arthgallo.com:8080/opensso.


MAKE SURE you enter your Fully Qualified Domain Name ONLY in the browser.

Entering this I am shown the following screen.


Now, I am ready to start configuring the opensso instance, which will be the subject of my next post where we configure this OpenSSO installation against ApacheDS.


Wednesday, October 24, 2012

Download and Install GeoServer on Linux


In this post, we walk through the steps of installing GeoServer 2.2 on Tomcat 7 on Ubuntu 12.04.

First thing is to setup Tomcat 7 on Ubuntu as indicated in my previous blog (http://opendesignarch.blogspot.com/2012/10/how-to-install-tomcat-7-on-ubuntu-1204.html)

As part of the default install on Ubuntu, two Tomcat 7 locations are created. The first is /var/lib/tomcat7 and the second is /usr/share/tomcat7. While the first folder contains all the configuration folders, the second contains the runtime components.

Listing the contents of /var/lib/tomcat7, we see the folder contents that includes the webapp directory. This is the directory where we will install GeoServer.

> ls /var/lib/tomcat7


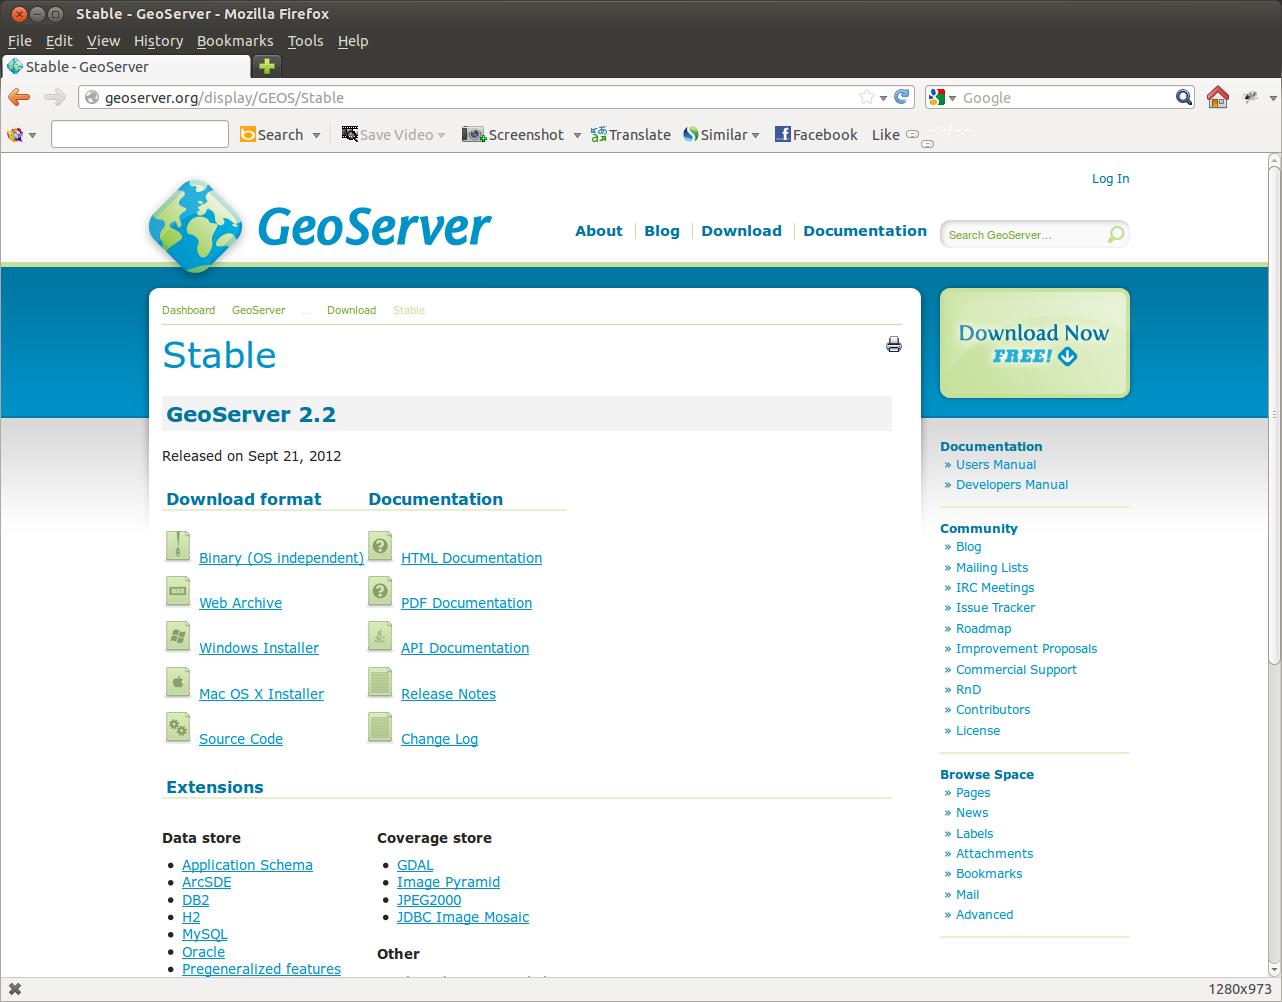
Now, lets download the Geoserver binaries. If we navigate to the GeoServer site, we shall see the following page by clicking the Download link.


We are interested in the Stable build. Also, get the Web Archive (.war) file.


Go ahead and download the web archive. I copied the installation zip to my local file.


Go ahead and extract the zip file. This will give you the .war file. You can delete the zip now.


Now open a terminal window and copy the extracted .war file from within the extracted folder to the tomcat7/webapps folder

For example, for me its the following

> sudo cp /home/arthgallo/Work/Servers/GeoServer/geoserver-2.2-war/geoserver.war /var/lib/tomcat7/webapps


Once the file is copied, Tomcat will automatically load it as a web application. We can test by entering the following url in a browser.

http://localhost:8080/geoserver


Enter the username password as “admin” and “geoserver” and click the login button to login.


Voila, we can access the administration console for Geoserver 2.2.


Take care...