In this post, I am going to walk step
by step on how to install Apache Directory Studio. In my previous
post, I had walked through the steps to install ApacheDS as a LDAP on
Ubuntu
http://opendesignarch.blogspot.com/2012/12/download-and-install-ldap-on-ubuntu.html
Now, to install Apache Directory
Studio, you need to first access the site
http://directory.apache.org/
to check for the latest release of the Studio.
You will see a screen as below
At the time of this post, version 1.5.3
was the most stable version available. To proceed, access the link
for Apache Directory Studio 1.5.3 on the navigation pane on the left.
You will see the following screen.
Click the link for downloading the
Linux version.
For my machine, I chose the 64 bit
version Linux x86_64. Once downloaded, I copied the installation to
my software folder from my downloads folder.
Now, to install this open a terminal
window and unzip the tar.gz file. In my case, the command is as
follows
> tar -xvf
ApacheDirectoryStudio-linux-x86_64-1.5.3.v20100330.tar.gz
This will unzip the contents as
follows.
We can see that a new folder has been
created with the unzipped contents. Not only that, it also contains
an executable for the Studio program.
Let's go ahead and execute the
application by entering the following.
> ./ApacheDirectoryStudio
Hitting enter show a splash screen for
the program.
This will be followed by the directory
studio loading with a blank screen.
The first step is to connect to an LDAP
instance. In a previous post,
I had walked through the steps for installing a LDAP server on your
Ubuntu machine. Let's go ahead and connect to that LDAP server. To do
so, click on the LDAP top level menu and click on menuitem “New
Connection ,,,”
I entered the following details on my
connection window
Name: apacheds (any random
name that you can understand will do)
Hostname: ub1204.arthgallo.com
(a fully qualified domain name I created by entering a dummy one
in the /etc/hosts file)
Port: 10389 (This is the
default port on which apacheds is installed.)
Encryption
method: No encryption method
Clicking on button for “Check Network
Parameter”, confirms that we have the right credentials.
Click OK to close the modal dialog, and
click Next to enter credentials. Enter the following parameters in
the next screen.
Authentication Method: Simple
Authentication
Bind DN or
user: uid=admin,ou=system (This
is the default for a fresh apacheds install.)
Bind
password: secret (This
is the default for a fresh apacheds install.)
Click on the button “Check
Authentication” to confirm if the parameters are entered correctly.
Great! Click OK to close the modal
dialog and click on “Next” to get to the following screen.
It shows a screen, where you can enter
additional details, but I did not change anything on this screen and
moved ahead.
Finally, on the last screen, the Studio
application prompts you to modify some preferences. Once again, I did
not change anything.
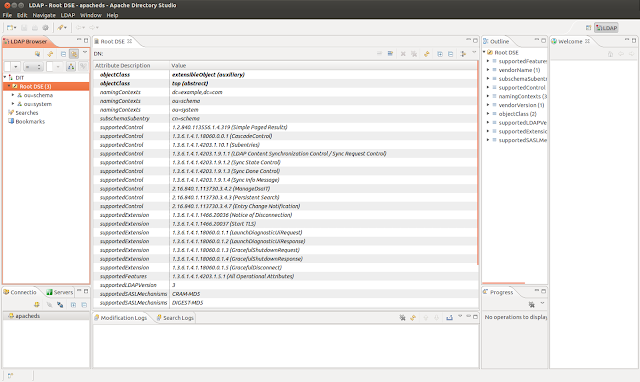
Now, click Finish, and you should be
able to see the following screen.
Now we can see our Directory server
setup and correctly installed.
Next we will configure this
environment. A few things we need to configure include setting up the
password. In this step, we will change the password.
Click on the following nodes to expand
the following sub-nodes on the tree control on the LDAP browser.
ROOT > ou=system > uid=admin
After selecting, uid=admin, you will be
shown an attribute called userPassword.
Double-clicking the attribute, will
open a dialog box where we can update the userPassword. First, we
need to re-enter the old password (which was the word “secret”
for the default installation).
Entering the default password, and
clicking on “Verify” button, will show a dialog box as shown
below.
Next, we need to enter the new
password. For that click on the “Ok” button to go back to the
Password Editor and click on the “New Password” tab.
Enter the new password, and if needed
change the encryption method. I left the encryption method as the
default “SHA”, but did enter a new password, as shown below.
That'sit! The password is now changed.
Now, we have configured our LDAP server
and shown how to configure the default password.
Have fun!


No comments:
Post a Comment